So yesterday I was talking with a wonderful woman about crafts when we got to the topic of organization. She, like myself can get buried in crafting clutter, and while my *ahem* workspace (aka bedroom) is still not quite as clean as I would like I spent the better part of the morning organizing my yarn and sewing bins, pattern folders and other knick-knacky things. I thought I would share my pictures with you, and maybe inspire some of you to organize your crafting space (cause lets be honest, we crafty folks tend to have messy crafting spaces!!).
So without further ado, here we go!
eep my sewing box exploded!! (I didn't think to take a picture of everything shoved in there haphazardly, I apologize :P)
first things first, organize my fabric. I have seen a lot of people organize by color on Pinterest, and I figured that would work for me too. All of my fabric used to just be stacked on top of one another which made it impossible to get anything from the bottom without messing up (and having to re-fold) every other piece of fabric. With the folders I am able to look inside a color folder to see my fabric without having to mess with the others. I recommend using folders that have closed sides like the one in the green box, it keeps everything form falling out, I ran out of these and started color coding my folders with my fabrics as well!!

Here is the finished sewing materials box, much easier to find everything now!! I have used a dowel (3/8 thick I believe!) and run my ribbon threw it so I would be able to keep them all together and able to be pulled out and rested on the top of the box, like it is in the picture. All my heavy weighted fabrics (quilting, and flannel) are folded in the bottom right of the box (they wouldn't work in folders very well!) and I have my fabric bundles and jelly rolls together, easy access for the new quilt I'm going to be making!!

A quick peek inside my knitting box, it's hard to tell in this picture, but all the skeins are stacked so that you can see the color when you open the lid, I wanted to show off some of my other tools that I love, I have my sizing chart, that lets me check if my gauge will be correct based on the weight of the yarn and the needles I am using, clipped to the lid are some highlighters so that they aren't lost in the mess of yarn. I use highlighters for my cross-stitching to mark what I have already done so I don't get lost on big patterns (like the one I'm working on now!)
The green boxes are from Michaels and I got them on sale! They are super cute and hold a LOT! I stack my crafting books in-between the two boxes so I always can find the pattern or project I want!
The two glass jars are also from Michaels and I use them (and a lot of other ones not in the picture) to hold all of my small items. The left one holds various buttons and a few colorful rubber bands, the one on the right, paper clips, I have others that hold binder clips as well. I also find that DMC/Nicole brand floss holders work really well to hold small items that don't have any other home, like the ones I have in mine :)
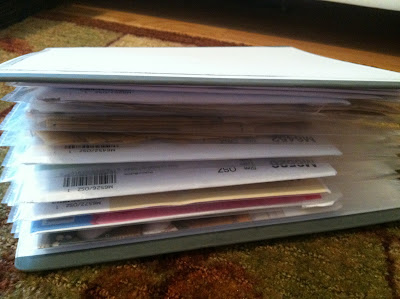
This is something new I'm trying, these are all my small McCall, Simplicity and Liberty Jane patterns. I put them in plastic protectors and clipped them into (the only) binder I have empty at the moment. A trip to staples is in order to pick up a much larger binder!!'
All printed patterns and instructions (including the "take me I'm free" project guides from stores) are kept in an accordion folder, and labeled to make sure I can actually find things :P
This is my knitting box, I take this everywhere with me. My great aunt (the one who taught me how to knit when I was 8) gave me this and I love it! The top tray comes out and all the needles are underneath. I keep things like a tape measure, extra yarn, the little red things are quilters thimbles which I use with the really small knitting needles because they tend to rub against my fingers in a terrible way.
And lastly my wonderful sewing machine, I got my Singer Promise for Christmas this last year from my boyfriend, it was so sweet, I had mentioned that I always wanted a machine and he picked this one out for me :) I keep it in this awesome bag from Michaels (though it was clearanced out after I bought it... boo) it was meant for scrapbooking but it fit my machine better than any of the actually sewing machine cases! (and it's much prettier!)
So that's it for Random Thought Thursday, tomorrow I'm going to be introducing a new segment with Hank the traveling Hamster (and Harriet my girl version) it going to be kind of like flat stanley but funnier :P Hope you see you then!
~Megan~


